How to designing a home?
Original author: Chris Reardon 2013
Key points
- A good home design considers all aspects of the site and building – orientation, site features, thermal performance, floor plan, materials, finishes, technologies, appliances, and landscape.
- Using a qualified designer is typically well worth the investment. Attention to good design ensures better quality outcomes and a smoother construction process. A designer with knowledge and experience in designing homes for sustainability can also help to ensure your home will be comfortable and energy efficient throughout its lifespan.
- You can use either an architect or a building designer to design your home. You can choose someone with their own practice, or your builder may have a designer on staff.
- Your chosen designer should work with you to develop a design that suits both your lifestyle and your budget. Make sure the sustainability features that you want are kept in mind throughout the design development.
- The designer should also be able to help you with the planning and construction approvals required before you start construction.
1. Understanding designing a home
Designing a home usually involves working with an architect or designer to plan a new home, including:
- Developing a floor plan that shows room locations and layouts.
- Incorporating sustainable design principles (for example, good orientation, design for climate) and features (for example, advanced glazing, solar photovoltaic (PV) systems).
- Deciding on construction systems, materials and finishes.
- Choosing inclusions such as appliances.
- Designing landscaping.
Before starting on your design, you should complete your preliminary research and know your budget. You can then follow this step-by-step guide to develop and finalise your design.
You can also use this design process to plan renovations or additions.
2. Step by step
Step 1: Choosing your designer
Choosing the right designer is an important step. Designers offer a range of services from concept design through to detailed design and project management. They can also coordinate a team of specialist consultants (for example, geotechnical engineer, structural engineer, accredited energy assessor, sustainability consultant, interior designer, and landscape designer).
Architect or building designer
Designers fit into one of 2 main categories: architect, or building designer. Both are accredited and regulated and either can design your home. An architect may be able to deliver more individually crafted and challenging designs than a building designer, but may also be expensive. However, the skill and cost level really depends on the individual architect or designer.
Architects are state-registered and regulated, and the legislation governing them varies from state to state. To gain registration under the Architects Accreditation Council of Australia, a person must hold a recognised degree in architecture or demonstrate equivalent qualifications, undertake a period of experiential training, and pass a practice examination. To remain registered, most states require architects to hold appropriate professional indemnity insurance and undertake regular continuing professional development.
Regulation and registration of building designers also varies between states. Building designers are registered by the state in Tasmania, Queensland and Victoria. They are moving toward national accreditation in other states and territories through the Building Designers Association of Australia. New South Wales and South Australian members are accredited through an internal process. Registered or accredited building designers in all states are required to carry professional indemnity insurance, and undertake and report continuing professional development to remain accredited. The range of services offered by building designers varies significantly. Many hold architecture or other specialist design degrees; others are qualified drafting professionals who have established their own practices.
How to choose
Engage a designer based on their experience, qualifications, and demonstrated capacity to deliver the type of home described in your brief and for your climate zone.
Many architects and building designers specialise in sustainable practice. Seek out a designer with skills in this field to achieve high-quality, cost-effective outcomes.
Seek references from previous clients and, where possible, visit homes that the designer has completed. Also obtain references for any nominated consultants to ensure they have the capacity to deliver consistent, professional results in your climate, region, and local government area. Make sure you sight their professional indemnity insurance.
You may want to delegate all of the design decisions for your home to the designer and consultants, or you may want to be fully involved throughout the process. In either case, discuss your level of involvement with designers before appointing one. Levels of client involvement in the design process are a common source of disagreement between the parties, so choose a designer who is prepared to work the way you want to.
Although it depends on the scope of your project, almost every project will require planning approval to go ahead. Your designer should have a sound knowledge of the applicable planning controls and a good working relationship with the local government authority. Otherwise, they should nominate an appropriately qualified consultant to negotiate approval on your behalf.
Good design is a smart investment
Step 2: Site analysis
Visit the site with your designer to do a ‘SWOT’ analysis (strengths, weaknesses, opportunities, and threats). This allows you to start thinking about how your design will respond to the local climate and specific attributes of the site.
Your designer’s advice is likely to be limited if they are not paid for it. To ensure a comprehensive site analysis and a detailed fee proposal, negotiate a set fee for this initial consultation or make it part of the design contract.
On the site, consider:
- local climate (including the climate in your region and the site’s ‘microclimate’)
- orientation
- solar access
- prevailing seasonal winds
- views
- overshadowing by landforms, trees and existing buildings (site survey)
- slope (site survey)
- soil type (geotechnical report)
- bushfire risks
- stormwater drainage
- access and transport
- services (power, gas, phone, internet, water, sewer)
- potential climate change impacts (possible increased risk of flooding, tidal inundation).
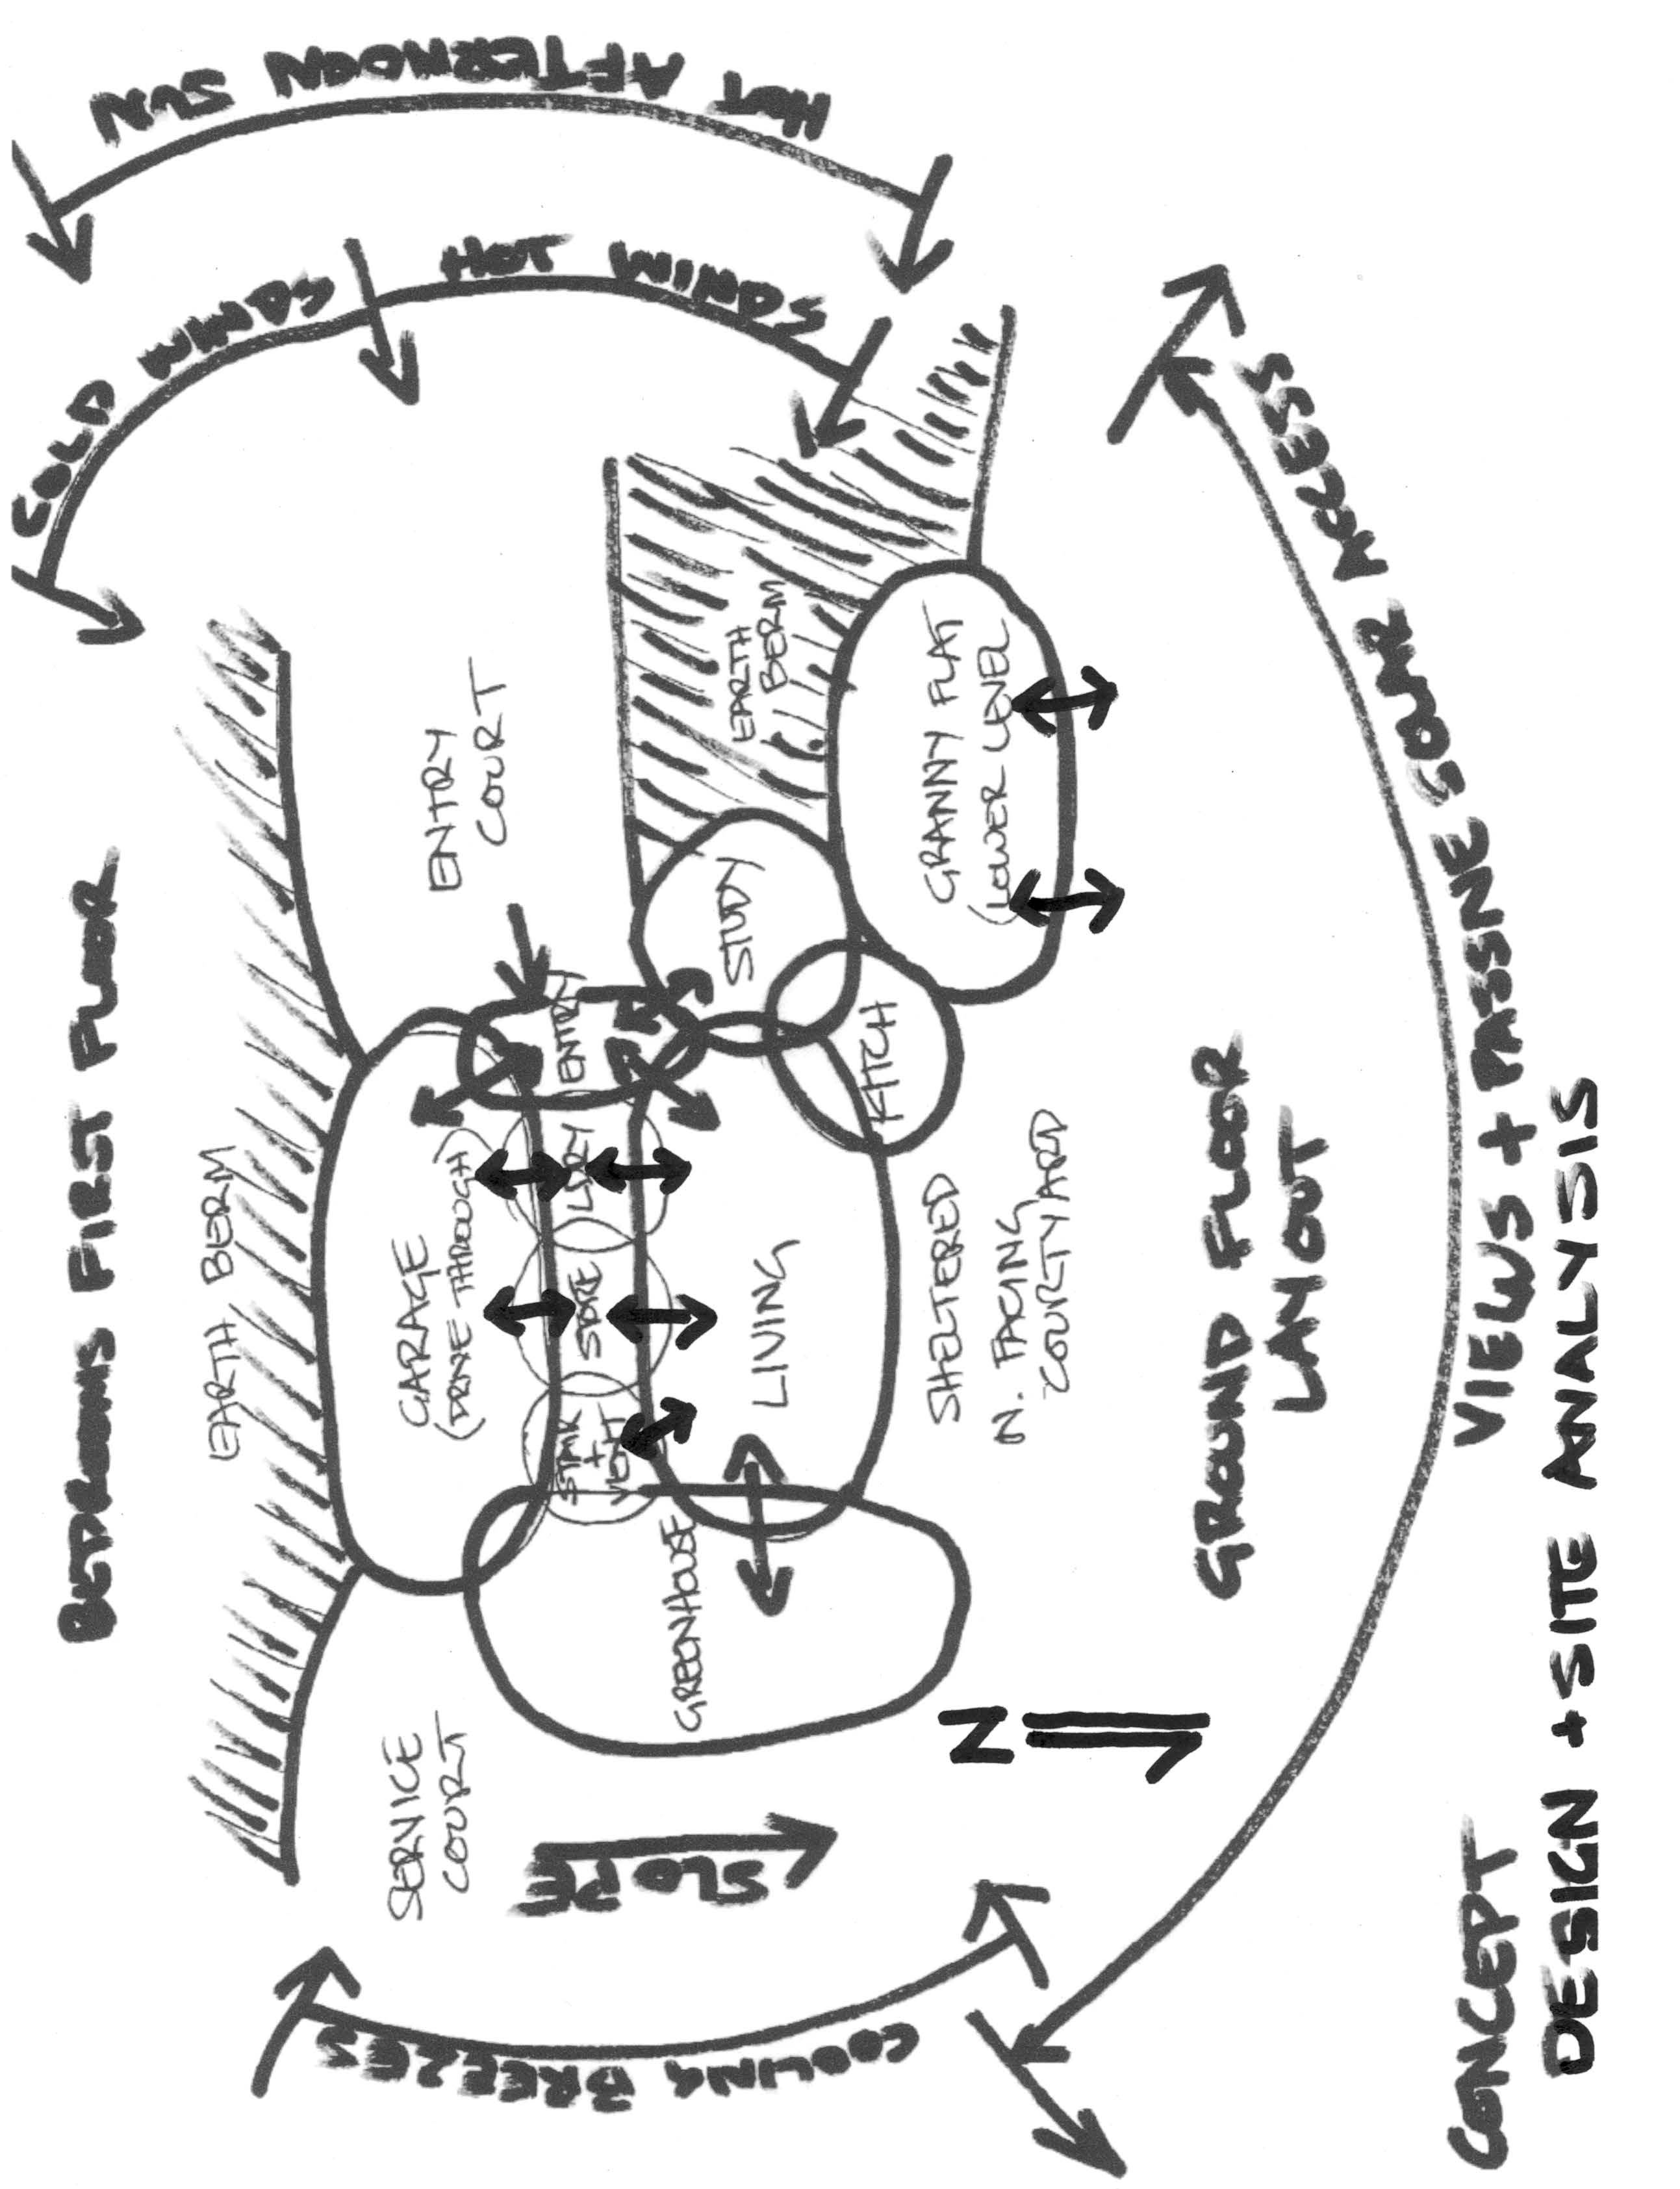
The designer can make a concept plan and site analysis after the first site visit
On completion of the initial consultation and site visit, ask your designer to identify possible design solutions that capitalise on the site’s strengths and opportunities, and overcome its weaknesses (for example, poor solar access) and threats (for example, slipping soils, fire risk or flooding).
Analysis of climatic influences at this early stage can identify how your site’s microclimate might vary from the generic climate zones outlined in the National Construction Code. Discuss orientation and other passive design strategies with your designer, and ask for clarification if you are unsure.
The first plan of your new home may emerge on the ‘back of an envelope’
Step 3: Developing a brief, fee proposal and contract
The brief you began in the preliminary research stage should be a ‘living document’ that is frequently updated throughout the design process as a record of your agreed decisions. It should also form the basis of the designer’s fee proposal. Attach both to your contract with the designer.
If your design contract was not signed earlier, it is usually signed at this step. If you are not happy or sure about the designer’s site analysis and fee proposal, consider seeking an alternative opinion from another designer.
Designers generally work within a range of costs per square metre. Size is a major determinant of cost, but other variables include preliminaries (for example, council, geotechnical and engineers fees), site difficulty (for example, slope, access, fire hazard, wind exposure), the construction system used, number and size of wet areas (bathrooms, laundry and kitchen), services (cost of water, sewer and energy supply) and access (for example, drive construction, materials transport distances, travel times for trades).
Ask your designer to review your preliminary budget in light of your brief to identify potential problems and suggest strategies to deal with them.
Your designer should also provide indicative costs for each sustainable design feature in your brief and recommend additional ones that may be relevant for your site or climate. Think about these costs from a lifecycle perspective. In many cases, ongoing savings on energy and water bills will soon outweigh any additional upfront costs for these features. ‘Quarantine’ these costings in your budget from the outset to ensure the features you want are delivered.
Although designers will provide information on likely cost ranges (known as an ‘opinion of probable cost’), designers generally do not accept responsibility for the final cost of your project because of the enormous range of variables beyond their control. Even the estimate provided by the builder, although it is based on more detailed information, can be subject to change due to unforeseen circumstances such as design variations that may be required during construction. Buying off the plan can increase budget certainty but reduce design flexibility.
Step 4: Concept designs
Designers often prepare several concept designs to communicate their ideas and allow you to assess them against your brief. These designs can range from a simple bubble diagram sketch on the back of an envelope, through to hand-drawn concepts of form and spatial arrangements.
When you look at the first concepts, make sure that you analyse them from several viewpoints, not just first impressions:
- Passive design principles – does the design suit your climate, and will it perform effectively?
- Space and layout – is it neither too large nor too small, is the space used efficiently, do the living spaces work well, is there enough storage?
- Look and feel – does it appeal to you, is it the character you want?
Concept designs should consider construction systems but not lock them in unless they are a fundamental component of your brief. The choice of high- or low-mass materials and the amount of mass required in floor, walls or roof to achieve thermal comfort varies depending on your climate and other design decisions.
Concept designs should build in initial sustainability choices
Step 5: Design development
Through discussion with your designer, choose the concept design that best suits your needs. The designer will then develop the concept into a preliminary layout. More than one concept can be developed in this way, but each additional concept developed may increase design fees.
It is common for designers to discuss the proposal with council planners and inspectors at this stage to identify any issues requiring resolution. It is also a wise idea to have preliminary discussions with 1 or 2 likely builders to check whether the design could be built within your budget.
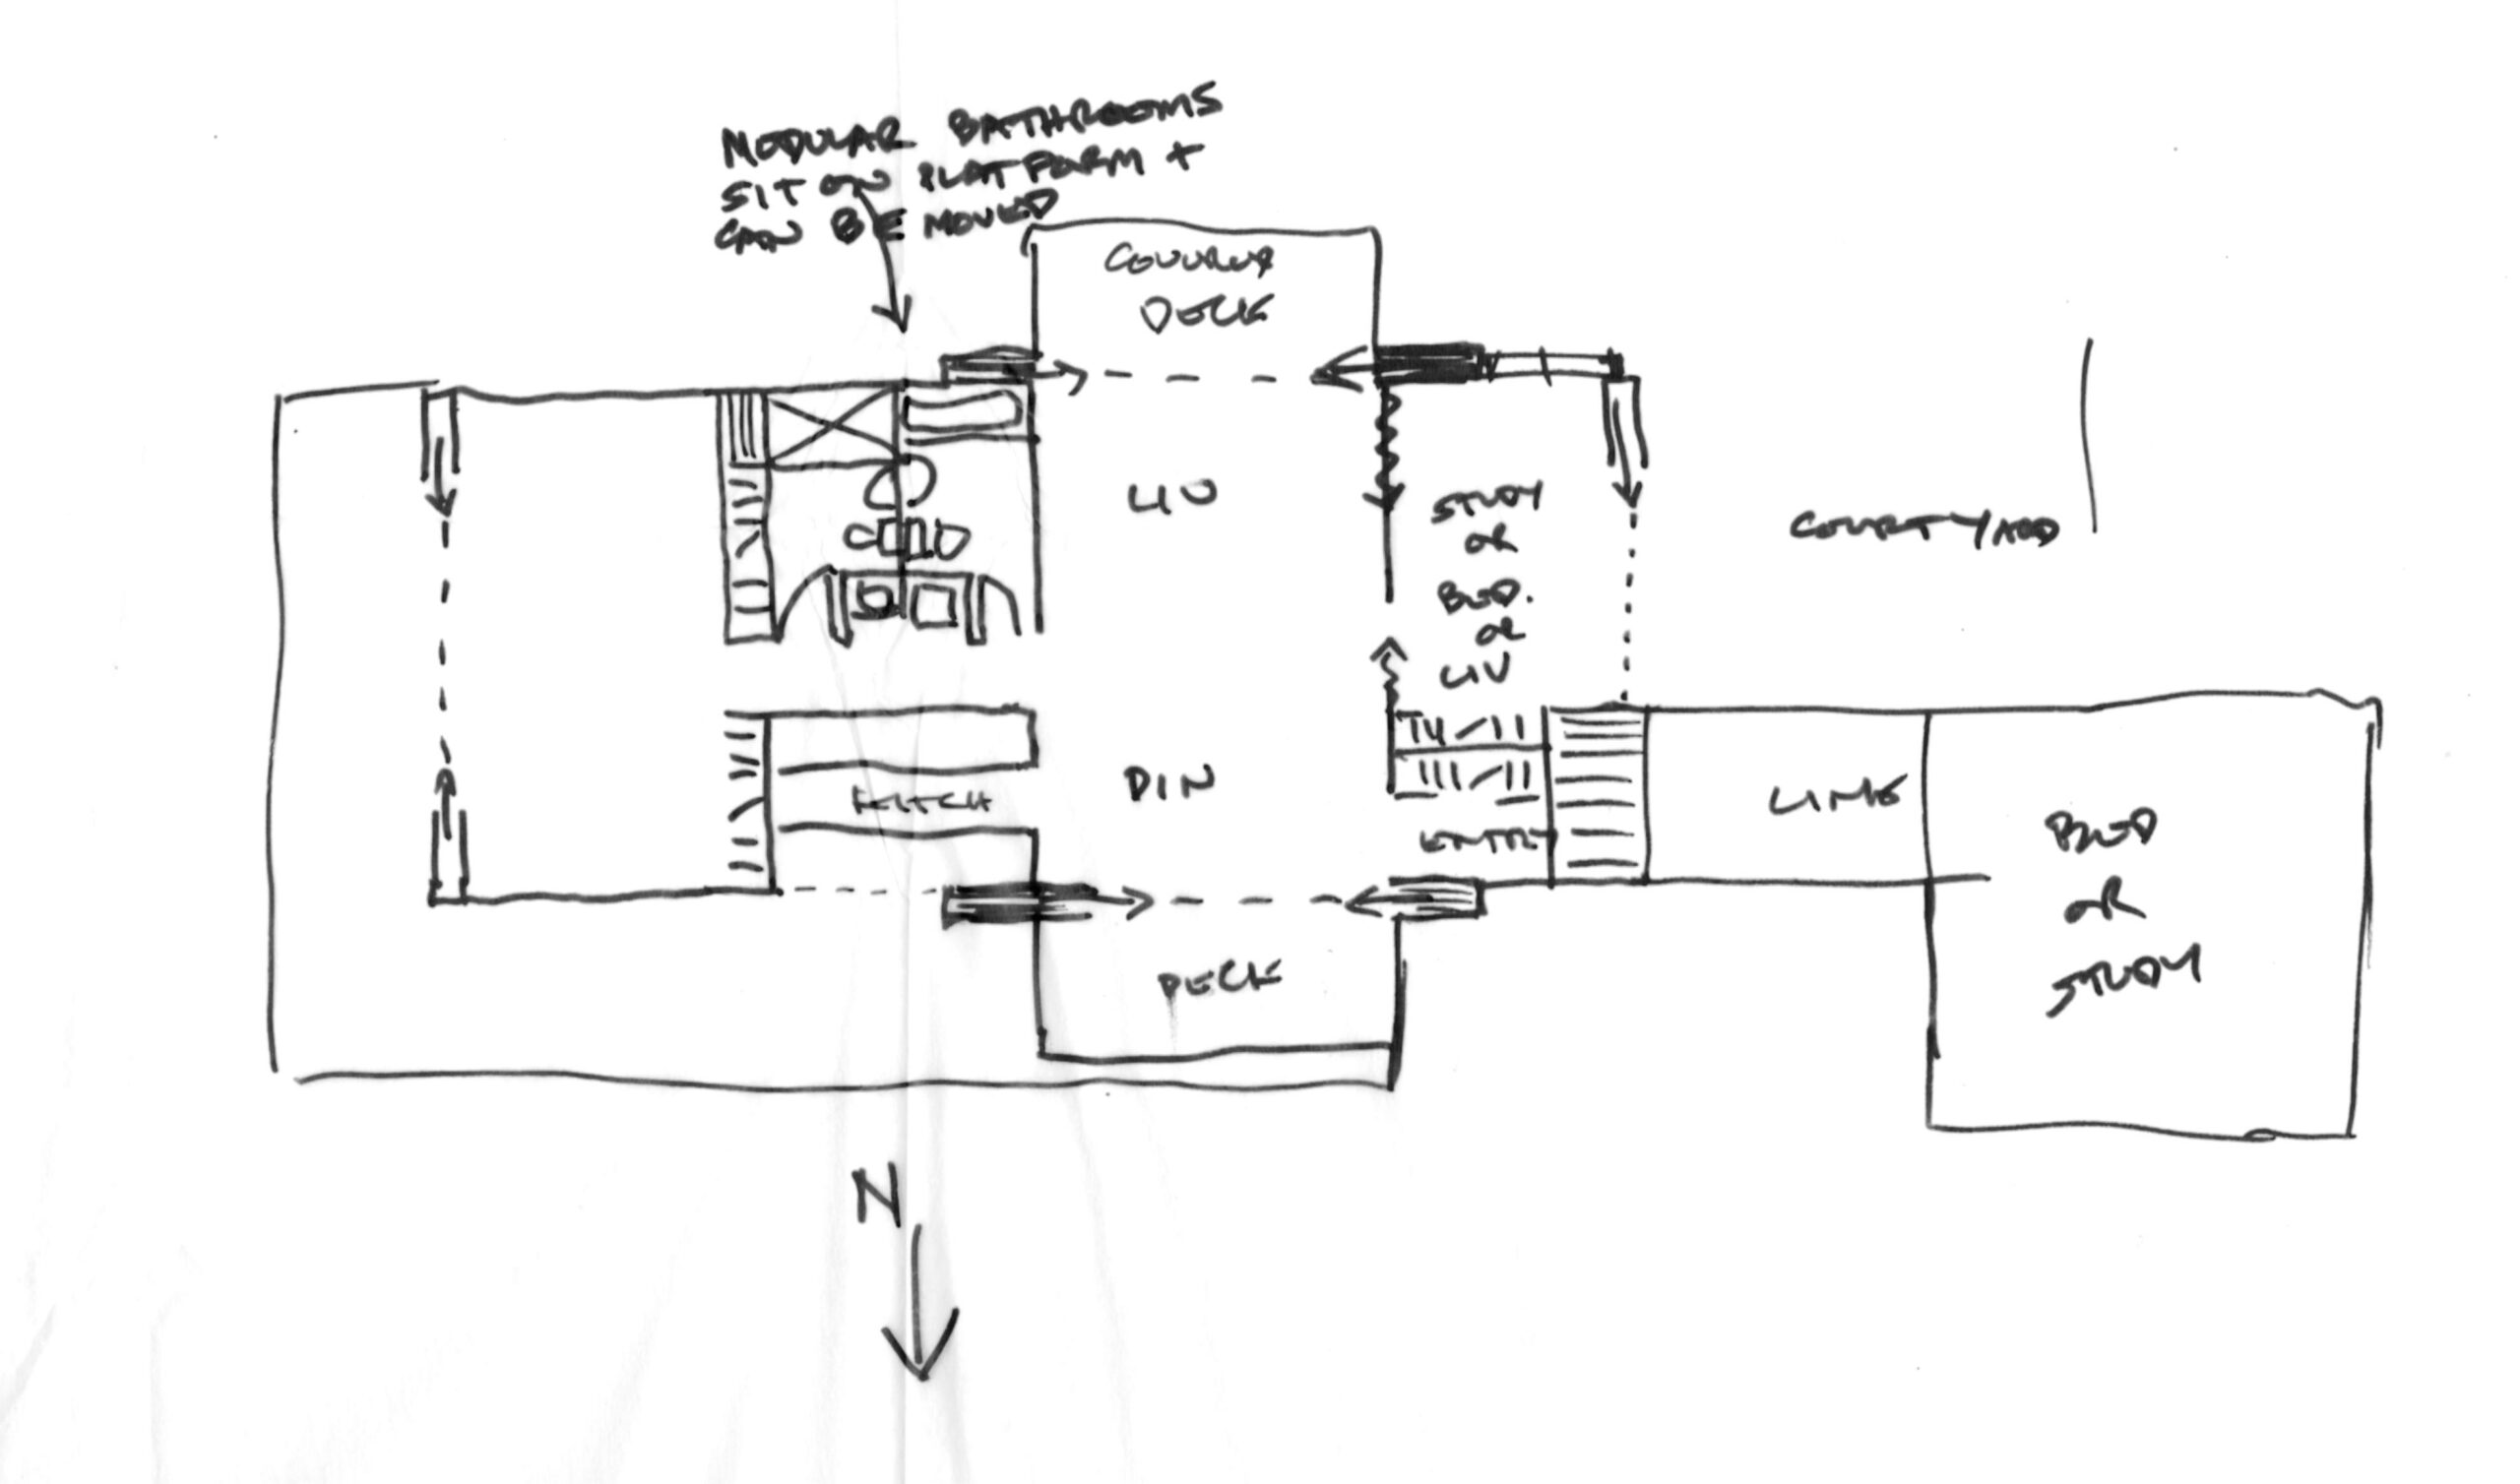
Floor plan and building shell
At this stage, the design usually includes preliminary room arrangements, window opening sizes and orientation, indication of indoor–outdoor flow, furniture layouts, and preliminary choice of construction systems. At this stage, spend time visualising your household living in the design. Revisit your analysis of your current home. Have problems been overcome? Have new ones been created?
You might consider asking your designer to include scaled drawings of the furniture you intend using in your home that can be printed and cut out so you can experiment with layout on the concept plans. This helps you visualise how your family might live in the house and identify any problems – particularly oversized spaces (refer to The liveable and adaptable home). Make a detailed list of your storage requirements.
Remember that a larger home can cost more to build and operate (depending on the complexity of design). A larger home may also use more of your yard. Reducing the size and reallocating that budget to sustainable features is an important focus during this stage of design. Trimming just a few square metres from each room can pay for double glazing or a photovoltaic array.
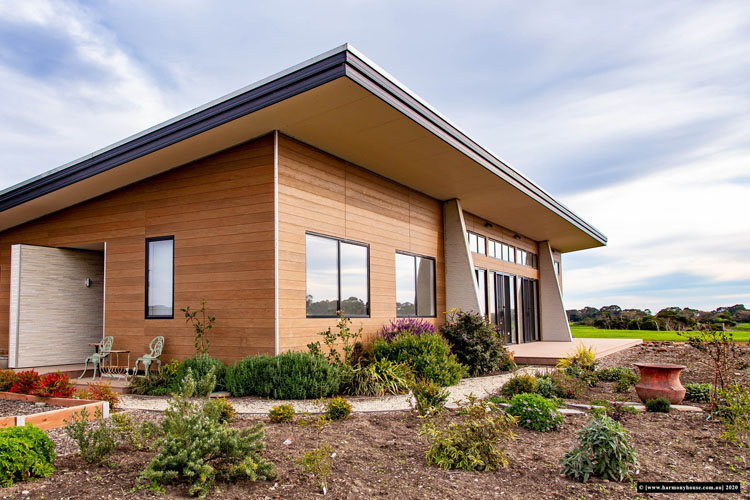
A smaller house saves in many ways. This home was constructed using free Design For Place home designs
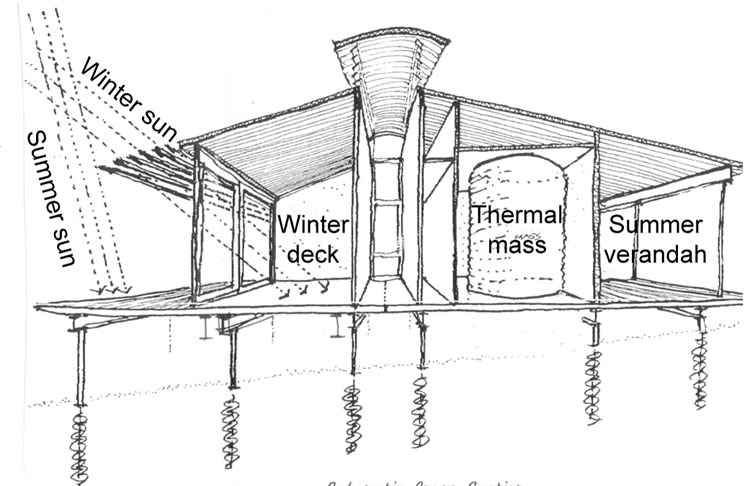
You or your designer can also make a simple cardboard model to help you better understand the form of the house and visualise views, breeze and sunlight entry. If doing this yourself, glue the plans and elevations onto cardboard, cut out windows and place the model on your site at different times of day and season to see sunlight penetration.
Optimising thermal comfort
The Nationwide House Energy Rating Scheme (NatHERS) provides computer-based home energy rating tools that are used to predict environmental performance and model the thermal performance benefits of window numbers, size, placement, and orientation, as well as various mass levels in different construction systems.
You can use such tools to guide design by engaging a qualified energy assessor who can model the thermal performance of your design and recommend improvements. This will help you to optimise your design for comfort and reduce the need for heating and cooling. It will also inform your choice of construction system. The modelling results for the final design can be used later to show how the building is meeting building code energy efficiency requirements.
If you are designing to the Passive House standard, then the Passive House Planning Package software must be used.
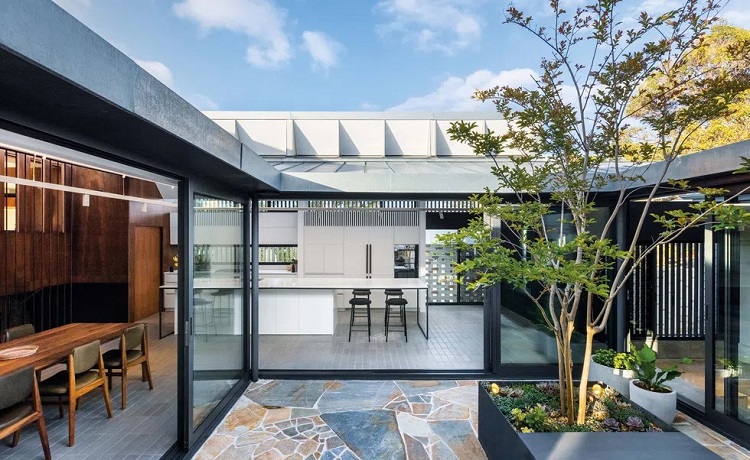
Finishes and landscaping
External and internal finishes are considered at this step. Take this opportunity to identify sustainably sourced materials with low lifecycle environmental impact.
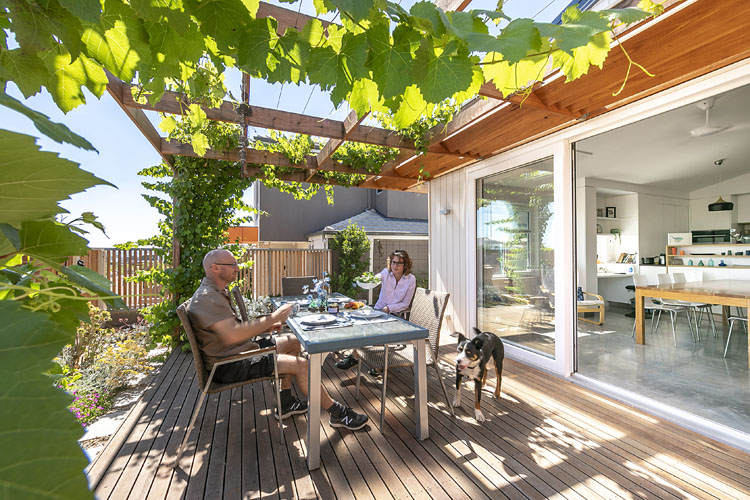
You can also start to prepare your landscape design. Landscaping makes many critical contributions including shading the building or windows, diverting breezes, creating leisure spaces, increasing visual appeal, ensuring privacy and saving water.
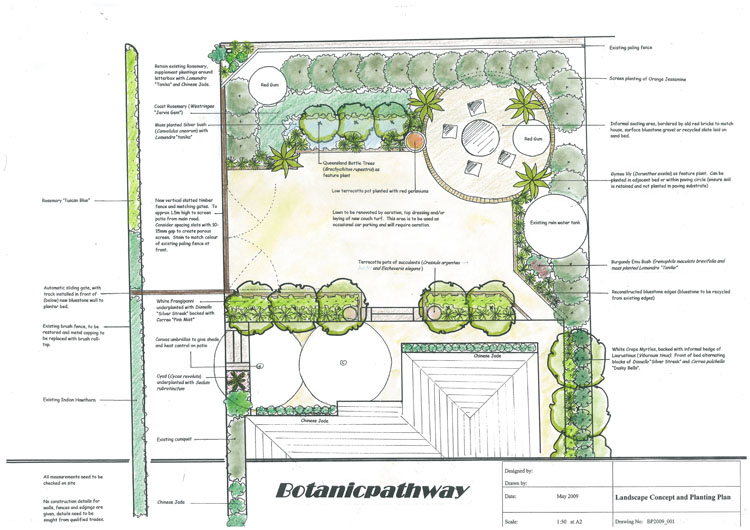
A landscape designer can add shade and character to your home
Step 6: Final design
At this stage, you finalise and sign off on all aspects of the design. Changes made after this stage has been signed off are likely to add to design costs.
You will need to finish choosing interior finishes and appliances, and finalise landscape design. Other issues to resolve with your designer might include final choices of external finishes, shading solutions, lighting, hot water, heating and cooling, rainwater, and solar (photovoltaic) electricity.
Final design is often when likely budget overruns become apparent and cost reductions are then made. At this point there may be pressure to eliminate sustainable design features. Remember that incorporating sustainability features now will save you money in the long term.
Also, remember that features you do not need right away can be built or added later. Spaces or rooms that you eventually want but do not require now can be incorporated in the total design and added cost effectively when future finances allow.
Similarly, if you cannot afford sustainable technologies such as solar PV panels or batteries upfront, they can be added later as long as the design includes roofs orientated to suit them and sufficient provision has been made in the electrical switchboard.
Step 7: Planning and construction approval
When both parties are satisfied with the design, the final plans are submitted to the appropriate authority (local government) for approval. Both planning approval and construction approval are required before you start building:
- Planning approval focuses on assessing the application against the relevant planning codes.
- Construction approval requires a greater level of detail on the design and focuses on compliance with the National Construction Code (NCC). You may opt to get the plans certified as compliant by a private certifier before submitting them to the authority, or have the authority do this as part of their processes.
A NatHERS certificate or other compliance pathway (or BASIX in New South Wales) may be required to meet the NCC requirements, either at planning or construction approval stage, depending on the jurisdiction and type of application. A statement of environmental effects is also commonly required at planning approval stage. This seeks an undertaking that your development will have no adverse impact on the local environment and often has a detailed checklist of items to be addressed.
Planning approval and construction approval are separate processes, but a combined application can be made to do both at once. However, it is often a good idea to apply for planning approval first. This means that any design changes required by authorities can be accommodated before you get into the detail of the design, saving time and money.
Straightforward designs on sites that are not subject to stringent planning controls are commonly submitted to the approval authority for simultaneous planning and construction approval. One set of plans can address both planning and construction detailing.
Step 8: Design detailing
In this stage, design and construction details are finalised and documented. The documents typically include:
- working drawings (details of how the design is to be built)
- a specification of the materials, standards, finishes, and products to be used
- engineering design and certification.
These (or more detailed versions) are given to builders when they are invited to quote for the work and form the basis of your contract with your builder.

Working drawings are used by the builders to quote for the job
Final schedules of materials and quality of finishes are documented in the specification by reference to Australian Standards, industry definitions of practice, and desired outcomes that are not noted on the plans.
Specification writing for environmental sustainability is a relatively new skill, and some designers fail to adequately address important items, practices, and standards. Make sure that the sustainable products and practices you want are specified, clearly and unambiguously, in quote documents, and draw these clauses to the attention of builders.
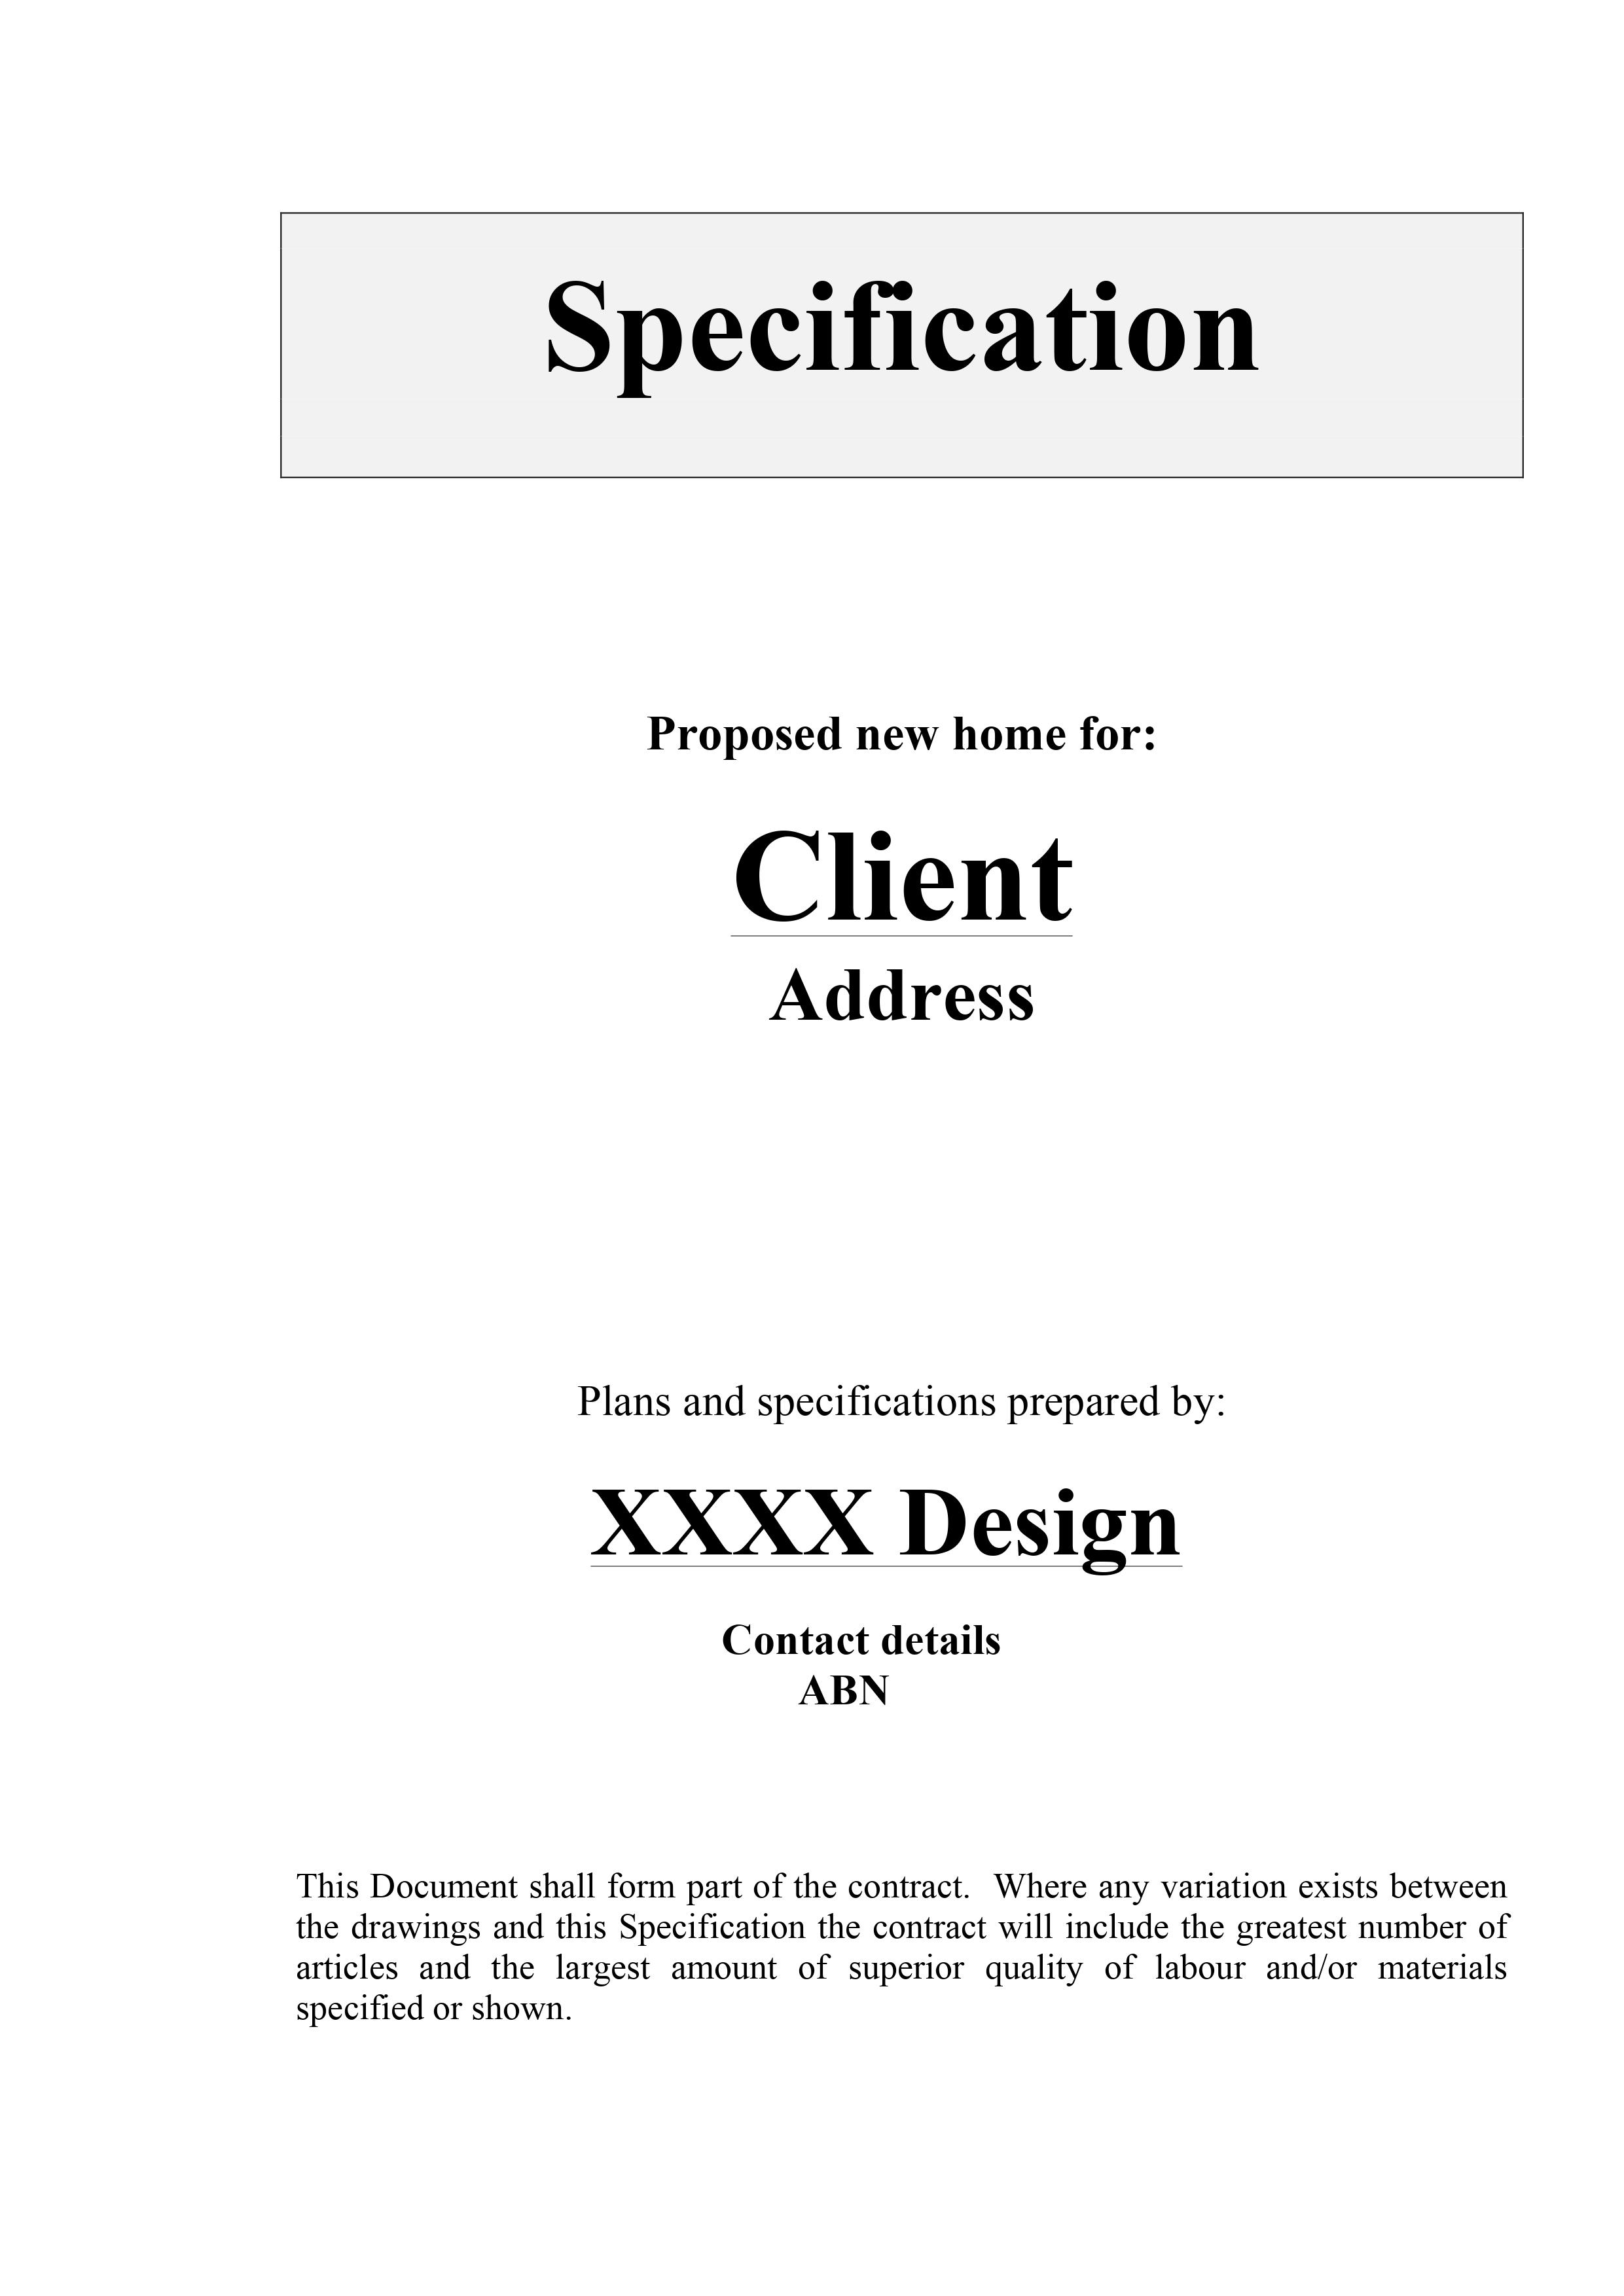
Specifications support the working drawings
Make sure that you pay attention to the products being specified. Databases like Ecospecifier Global and Environmental Product Declaration Australasia can help with the selection of environmentally preferred products. Several certification schemes can independently certify products and services as environmentally sustainable. These include Good Environmental Choice Australia, Global GreenTag and Green Tick.